Key Takeaways
- Children who prefer to use their left hand can often find it challenging to integrate into a world designed for right-handed people.
- At Real OT Solutions®, we want to help you relate to children who require a little extra support when writing with their left hand.
- Learn how to guide your left-handed child as they develop their writing, drawing, and cutting skills in preschool and beyond!
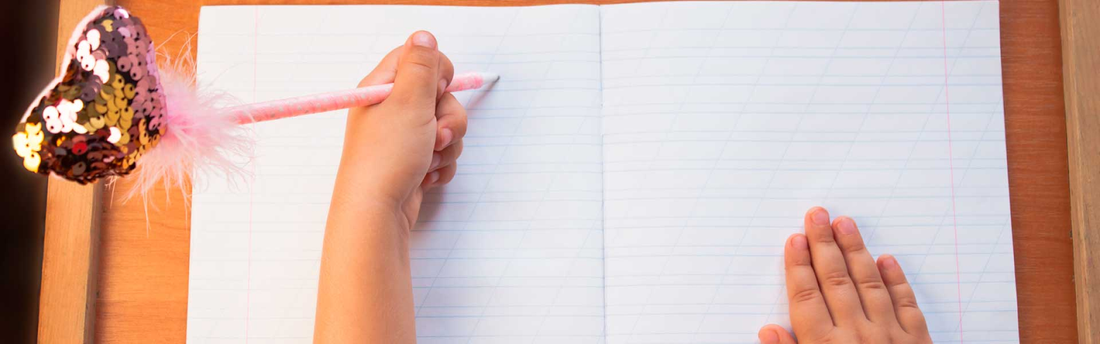
Left-Handed Writing
In many ways, the world is created for right-handed people. Children who are left-handed can find many daily tasks challenging, including handwriting. Left-handed people often discover that their writing hand covers what they’ve already written. If directions are posted in the left margin or side of the paper, their arm may cover the instructions, thereby preventing them from reading them. Additionally, as they write and their arm moves across the paper, there is a tendency to smear the ink or lead from the pen or pencil.
The good news is that there are a lot of strategies and accommodations you can employ for left-handed handwriting for kids that make your child’s writing experience better. And if they continue to have difficulty, pediatric occupational therapy professionals can assist your child with left-handed handwriting so that both the processes of writing and reading are more successful. Learn how to write with the left hand to help your child grow and thrive!
Struggles with Left-Hand Writing Practice
One of the common compensation strategies a lefty adopts to get their wrist and hand out of the way is to become a “hooker.” In other words, they often bend their wrist forward in such a way as to appear to have an awkward writing posture. Without reasonable alternatives, left-handed children will practice hook writing throughout the day, using a position that quickly leads to discomfort and fatigue. The extra effort for left-handed handwriting may also lead left-handed children to experience pain and poor legibility.
It would be easier for left-handed writers to move a pencil from the right side of the paper to the left side of the paper. However, for English language writers, or any other languages that similarly write left to right, right-handed writers have an advantage. First, it’s just an easier and more natural movement to figuratively ‘pull’ a pencil across a page rather than to ‘push’ one. But there is a second and perhaps even more significant disadvantage left-handed writers have, and that is the tendency to smear or cover what’s just been written.
This can easily lead to demotivation. How can you help them learn left-hand writing? Learn how to teach kids handwriting below:
Left-Handed Handwriting Tips

Fortunately, there are several things parents, teachers, and occupational therapists can do to help children learn how to write with the left hand more comfortably. In fact, you can even use these tips if you are right-hand dominant but can no longer use this hand to write, or if you would like to improve your own left-handed handwriting out of curiosity.
1. Start by Practicing the Movement
Left-handed writing practice should begin with repeatedly drawing the lines and shapes that form letters, which develops motor memory. Making the same letter over and over again may seem tedious, but there is no fast way around learning left-handed writing. Developing a new motor skill requires practice, practice, and more practice. You won’t be able to write a full sentence or even complete words with your non-dominant hand right away.
Attempting to do so will be frustrating. When teaching handwriting, it’s a much better idea to simply start with the component parts of letters, including vertical, horizontal, slant/diagonal, and circular strokes. Over time, you will be ready to trace and copy letters and shapes.
Research on writing readiness indicates that one should first master the following nine lines and shapes: vertical, horizontal, left and right diagonals, circle, X, triangle, cross, and square. When you can independently recreate these lines and shapes with left-handed handwriting, start with letters that have similar strokes. Vertical lines are the easiest.
Regardless of whether you use the left or right hand to write, to develop consistency in printing letters, it’s best to begin with the uppercase alphabet since all of these letters are the same size. That means the first letters you’ll practice may be uppercase I, T, L, H, and so forth. If your students write inside letterboxes, consider starting with letters F, E, D, P, B, R. It is interesting to note that while right-handed children typically cross the letter t, T, J, or make the horizontal strokes in E or F in a left-to-right direction, a more comfortable direction for left-handed handwriting may be right to left.
Similarly, while righties typically make a circle or the letter o in a counterclockwise direction, an easier movement pattern for lefties is often clockwise. It has to do with the natural movement of the small joints in the fingers.
You can use any book or try a tool designed to help children learn left-handed writing, such as the Real OT Solutions® Student Handwriting Workbook or Handwriting Kits for individual letter practice.
2. Use Your ABCs
When you move on to left-handed cursive writing, you’ll want to start with developing the movement patterns in cursive lettering. Known by many names, the Size Matters Handwriting Program’s Cursive Kaleidoscope workbook refers to the initial cursive lowercase letter lines as Waves, Peaks, Hills, and Sails. Once again, left-handed writing practice is your friend.
You’ll need a lot of repetition when learning how to write with the left hand before these movements become comfortable and automatic. Take your time and draw these letters every day. As time goes on, you’ll get better at forming the letters correctly, and writing cursive and/or writing with your left hand will start to feel like second nature.
3. Try Writing Sentences
Whether right or left-handed, when you feel more comfortable tracing letters, move on to writing words. Start with short ones that are 3, 4, 5, or 6 letters in length. Then move on to 2-word phrases, 3-word phrases, and eventually sentences. If left-handed handwriting is new to you, be patient. Sentence writing involves so many higher cognitive skills; fluency and speed take a back seat to composition. And if you add in the fact that writing itself is an unfamiliar or unnatural action, you’ll realize you need more time.
Popular Left-Handed Handwriting Tips

There are several tips and tricks that can help children practice left-handed handwriting and avoid some of the problems inherent in left-handed writing practice. These tips can help lefties compensate for known issues and better prepare them to learn how to write with the left hand, including everything from how they angle the paper for handwriting and grip the pencil to the appropriate layout of the worksheets.
1. Paper Placement
Children who are right-handed should rotate the paper counterclockwise 30 degrees. By contrast, children who are left-handed should rotate their page 30 degrees clockwise. Unfortunately, some educators, in an effort to be consistent, encourage the same rotation for all kids. However, the angle recommended for right-handed children will just make the difficulty even more pronounced for left-handed children.
Instead, a more comfortable left-handed handwriting angle would be to rotate the paper clockwise to the right at 30 to 40 degrees. This allows them to see their work clearly and reduces the amount of smudging that takes place as they move their hand across the page.
2. Pencil Grip
Knowing how to hold a pen left-handed is very important. Left-handed writers often find that it’s easier to see their work when they hold their pencil or pen a little further up the shaft. Adding a pencil grip or an elastic band around the pencil at the right spot can guide the writer on where to place their fingers for left-handed writing.
3. Writing Positioning
Slanted surfaces can make a big difference for left-handed writing practice, as they can prevent them from developing a hooked wrist. There are several ways to achieve a slanted writing surface. One is to elevate the front legs of the desk. Placing 4” of carpet samples underneath those two desk legs could do the trick. Or, if using an adjustable height school desk, elevate the two front legs one or two notches. Slant boards are also available for this purpose. You can even find a recipe for creating a slant board on our website under the Free Downloads!
Other solutions for slanted surfaces include writing on the cover of a 3-ring binder, with the wider edge on the far side, or learning how to write with the left hand on a vertical surface like an easel.
4. Student Workbooks
Workbooks and resources designed for left-handed handwriting are a great choice. They offer left-hand focused tips, advice, information, and instruction. Whether it’s a worksheet, prompt, model, or instruction, our handwriting resources feature everything a new writer needs to know exactly where they can see it best. A beginner writer shouldn’t have to lift their hand or put it in an awkward position to view the model or directions!
If the child is practicing on a handwriting practice worksheet and there are directions or words to copy in the left margin, either rewrite the directions so they are also visible on the top or right side of the page, or provide an extra copy altogether. This way, they’ll be able to see the page without hooking their wrist. If you’re looking for materials to promote left-handed writing practice that works equally well for right or left-handed writing, Real OT Solutions’ Letterbox Worksheets and Alphatrangle can also offer unique solutions to help teach left-handed handwriting.
Find Help at Real OT Solutions®
With this guide to teach how to write with the left hand, you’re much better equipped to help all your students. And you can continue to ensure their right and left-handed handwriting improves with our support!
Real OT Solutions® supports therapists, teachers, and parents with a range of educational and therapy products and services. From pre-planned handwriting curriculum for homeschool and grade school to OT courses online, we have help. And if you need additional support in helping your child, student, or patient write with their left hand, reach out to us for guidance.